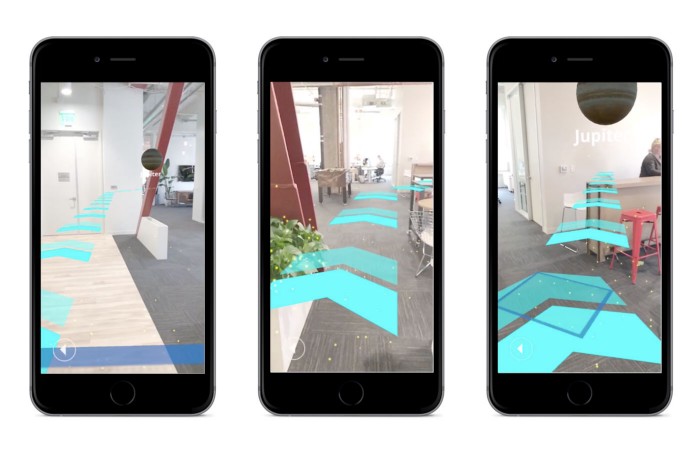
It’s easier to navigate indoors when you can see your surroundings. Not just look at a dot on a grid, but move through space naturally as contextual information conforms to your view — not the other way around.
Using the Maps SDK for Unity, we made an app for navigating our San Francisco office in augmented reality, and we’re sharing the code:
Learn more about using Mapbox in Unity or read on to learn how we built the demo. You can download the project here and open it with Unity 2017.2.0f3 or later. Then, set up an access token, and open the ButtonSyncronizationWorldScalescene.
We divided this project into 3 phases:
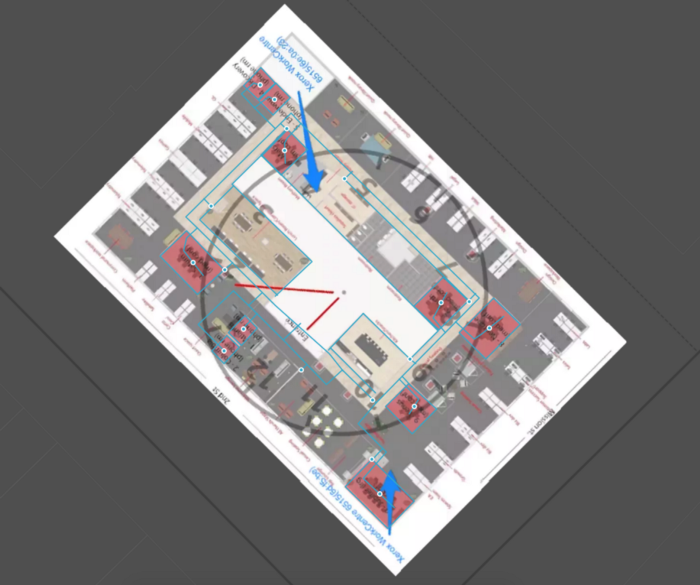
- Import indoor map data to Mapbox: In phase one we uploaded a GeoTIFF image of our office blueprint to Mapbox Studio and created a dataset containing vector features such as walls, rooms, and hallways.
- Consuming the custom data in Unity: In the second phase, we rendered a 3D map in Unity, so the rooms were scaled and positioned 1:1 with real-world space.
- See it localized in world scale AR: In the third phase, we created a seamless augmented reality navigation experience with localized 3D features of our office space.
Phase 1: Importing the indoor map
For building vector features and adding indoor map data, we had to first add a geo-referenced image to Mapbox Studio. After that, we added walls, hallways, and conference room features to our dataset along with custom properties designed for consumption in Unity.
After adding the necessary features and properties, we exported that data to a tileset which we used in our Unity project.
Phase 2: Render in Unity
For rendering the features from our tileset, we used a MapAtWorldScale with a RangeAroundTransformTileProvider. We chose MapAtWorldScale because we wanted the map to render at the real-world scale to support the augmented reality experience. RangeAroundTransformTileProvider uses the AR camera’s root transform to load tiles around it. The rendered tiles contain the vector data information that we added to our dataset.
For rendering the conference rooms, we used a POI Modifier for instantiating 3D prefabs of planets with their names under them — our conference rooms are named after planets in our solar system.
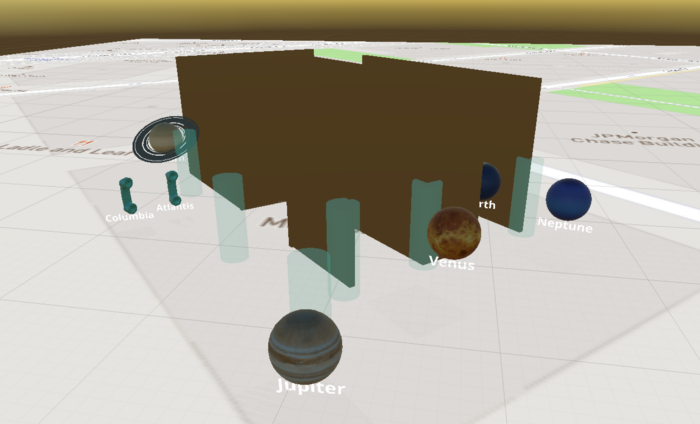
Additionally, we used height and material modifiers to extrude the walls and render them with a masked shader to provide occlusion in AR.

Here’s an overview of how we set up our modifier stack to render the features listed below:
1. Synchronization Points
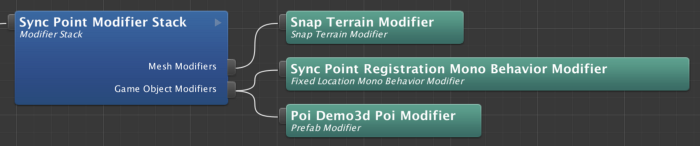
We introduced a new modifier called FixedLocationMonoBehaviorModifier, which registers the location data associated with synchronization point with the help of SynchronizationPointsLocationProvider. The registration process sets up the required UI elements corresponding to the sync points.
2. Destination Points
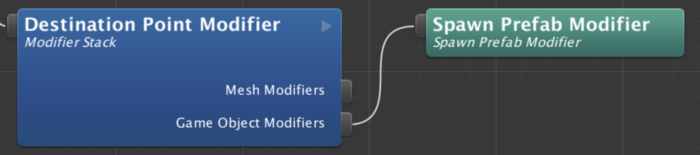
To set up the destination points, we used SpawnPrefabModifier, a variation of FixedLocationMonoBehaviorModifier, which in addition to registering the destination points, also spawns a prefab (3D model of a planet) to represent the conference rooms.
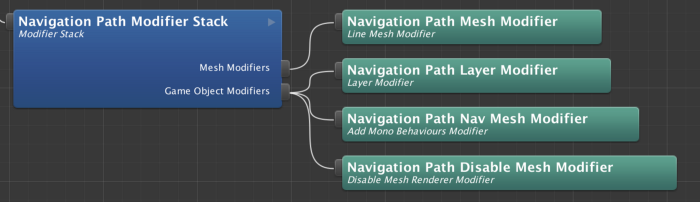
3. Nav Mesh
We use Unity’s NavMesh to compute the navigation path for this demo. NavMesh requires a mesh as input that’s used as a navigable path. To create this navigable path, we added line features in our dataset connecting corridors with synchronization and destination point locations.
To consume the navigation path data, we use a modifier stack as shown below.
Phase 3: Localize in world-scale AR.
The real challenge is positioning, orienting, and tracking a user’s device in the AR world. Before starting the experience, we had to ensure that the 3D features in Unity were perfectly aligned with the real world position and orientation of the device. We solved this by adding a two-step process that a user had to complete before seeing the AR world positioned and oriented properly:
- In the first step, a user has to scan the surrounding floor for a ground plane.
- After completing the first step, the app brings up a UI showing different sync point ids. The user has to then walk up to a sync point and press the corresponding button to position and orient the AR map with respect to the device’s position and orientation.
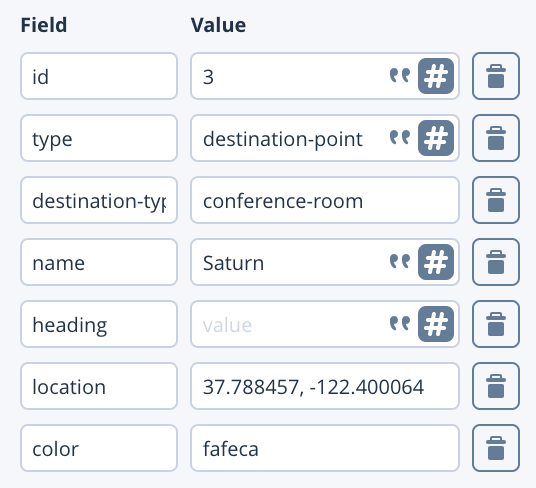
For easy identification, we marked nine spots in the office with the corresponding sync point ids from our dataset. The table below shows the set of properties we added for those sync points:
Once the 3D map is aligned, we show the list of destinations that the user can navigate to. Then, based on the destination, the app places a continuous chain of arrow sprites on the NavMesh to show the directions to the chosen destination.
Future improvements
The primary purpose of this project was to take advantage of Mapbox Studio’s abilities to serve indoor map data, visualize it in AR with the Maps SDK for Unity, and implement map-based navigation in an indoor setting. For that reason, we restricted ourselves to synchronizing device position and orientation with a basic manual synchronization step that’s dependent on user input.
However, the experience would be significantly improved with the use of Bluetooth beacons. By tracking a user’s position and orientation continuously, this would provide automatic synchronization context at regular intervals. It would also allow a seamless transition between indoor and outdoor navigation, covering a wide variety of use cases.
Next steps
Experiment with the project and let us know what you build on Twitter, using #BuiltWithMapbox. To get started, explore the tutorials on our help page and learn more about location-based games, AR, and VR applications.


Related articles
Snap builds with Mapbox to deliver wearable AR navigation

Using isochrones to understand reachability in web and mobile applications