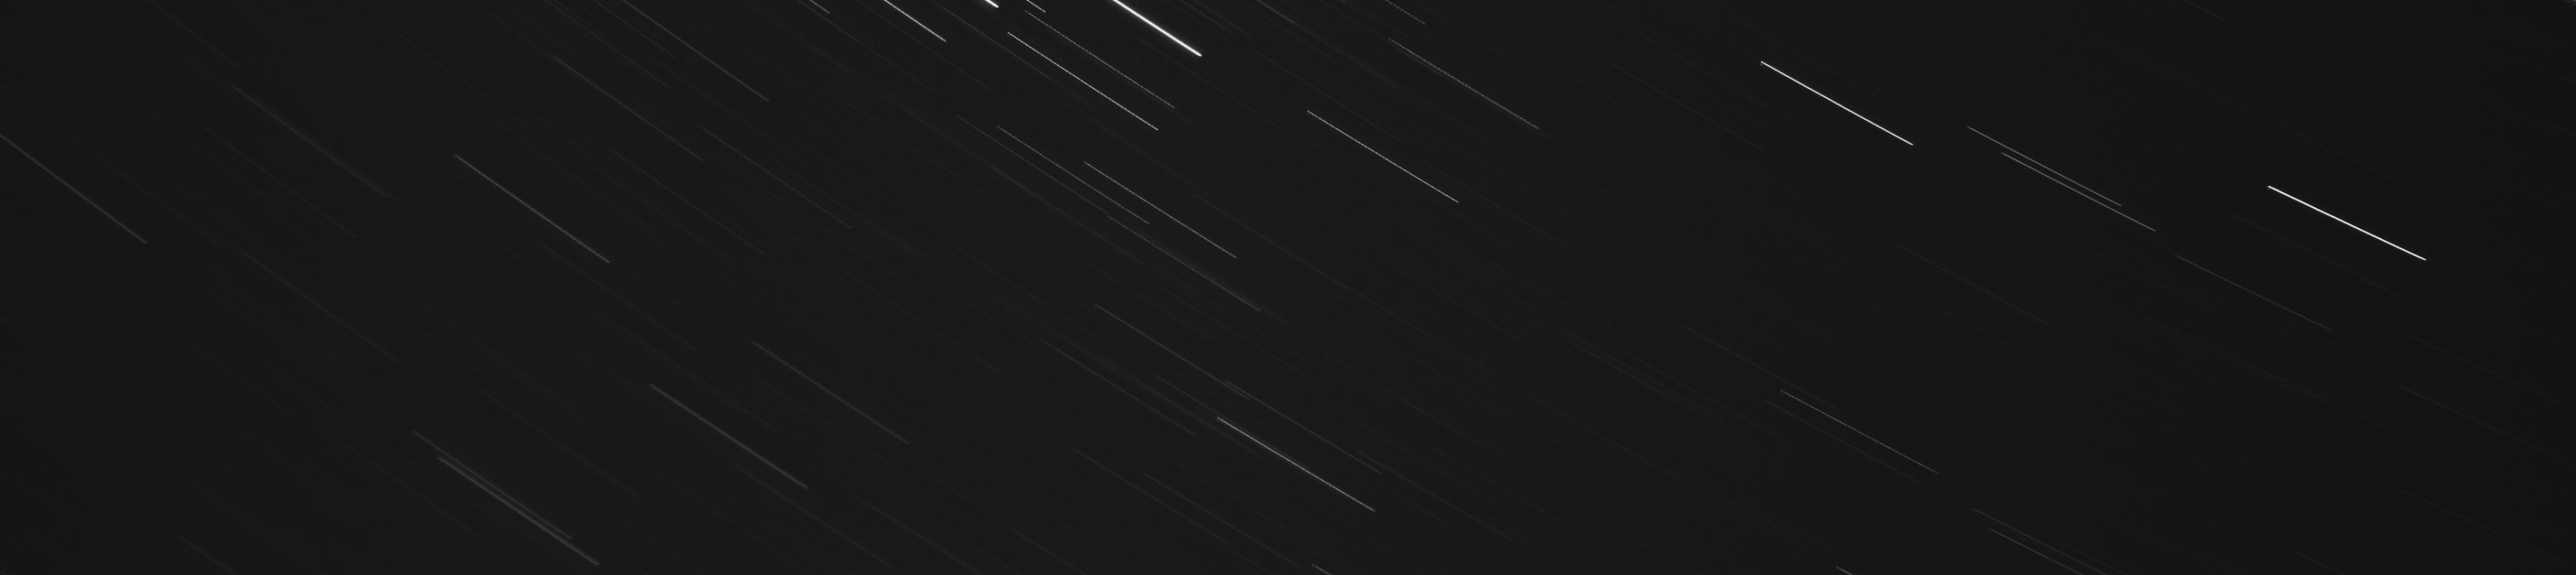
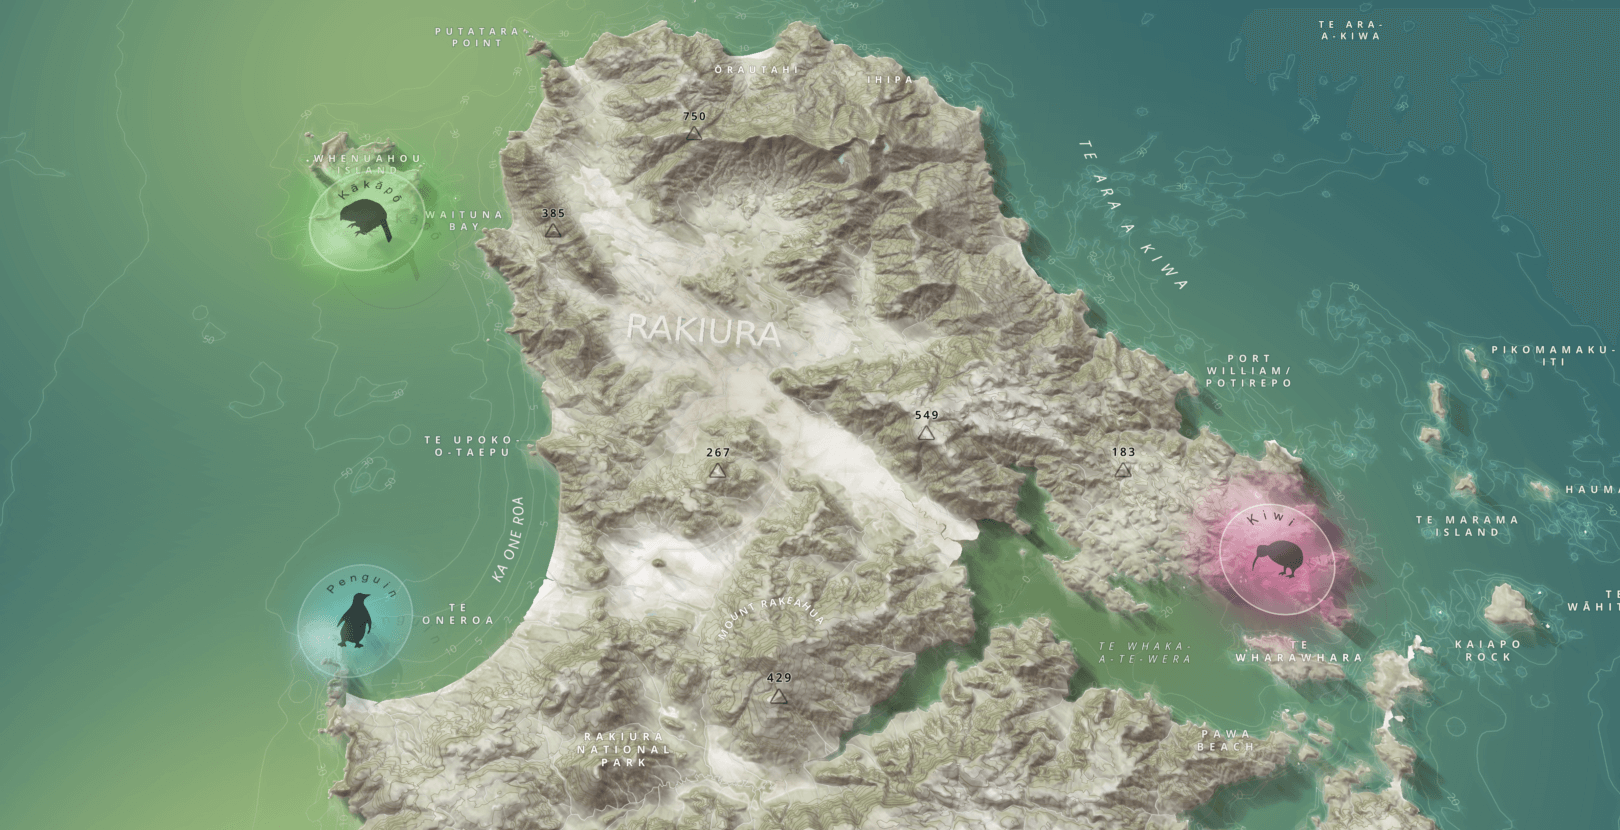
I wanted to create a new way of highlighting a location on a map using a glow effect and a symbol, without totally obscuring the area of interest underneath, so I created is a “glass disc” effect. Spoiler alert — now they glow!
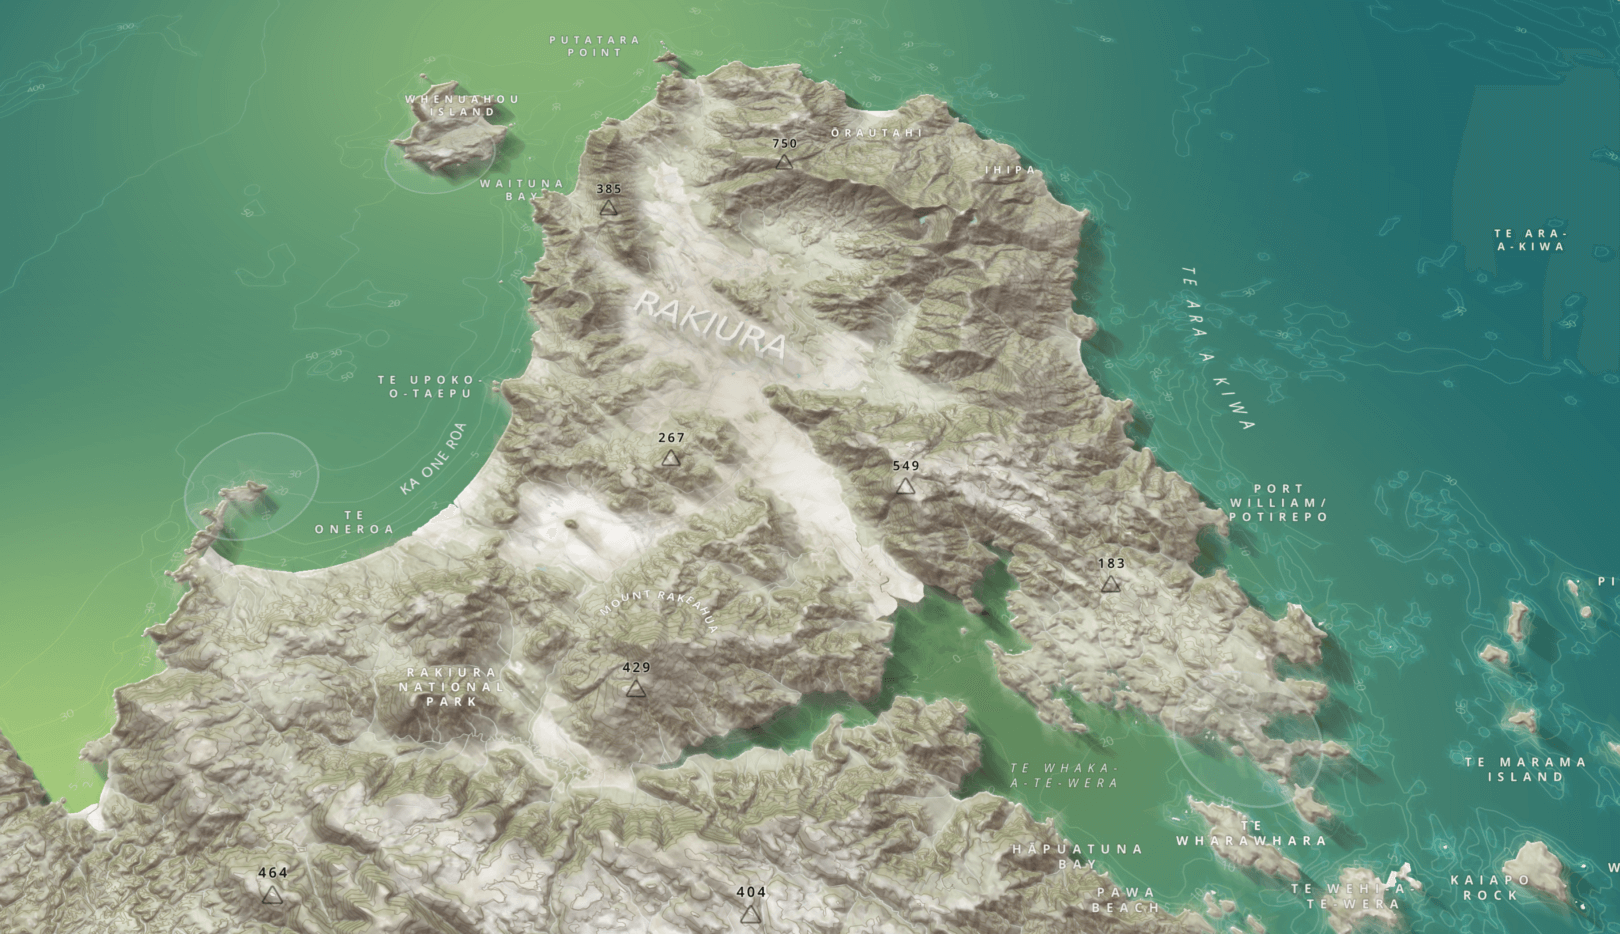
Points of interest are key to cartography. How can you make a point of interest stand out from the rest? Or highlight your business or organization on a map? Or in this example, show what species are found on the Island of Rakiura, New Zealand.
This “glass disc” effect has 3 simple steps using circles and icons in Studio. (Note: if you’re new to Studio, creating points or loading your own custom icons is simple in Studio, see Part 1 and Part 2 of the tutorial first).
To start, I have the 3 points of interest styled as a black circle in my map:

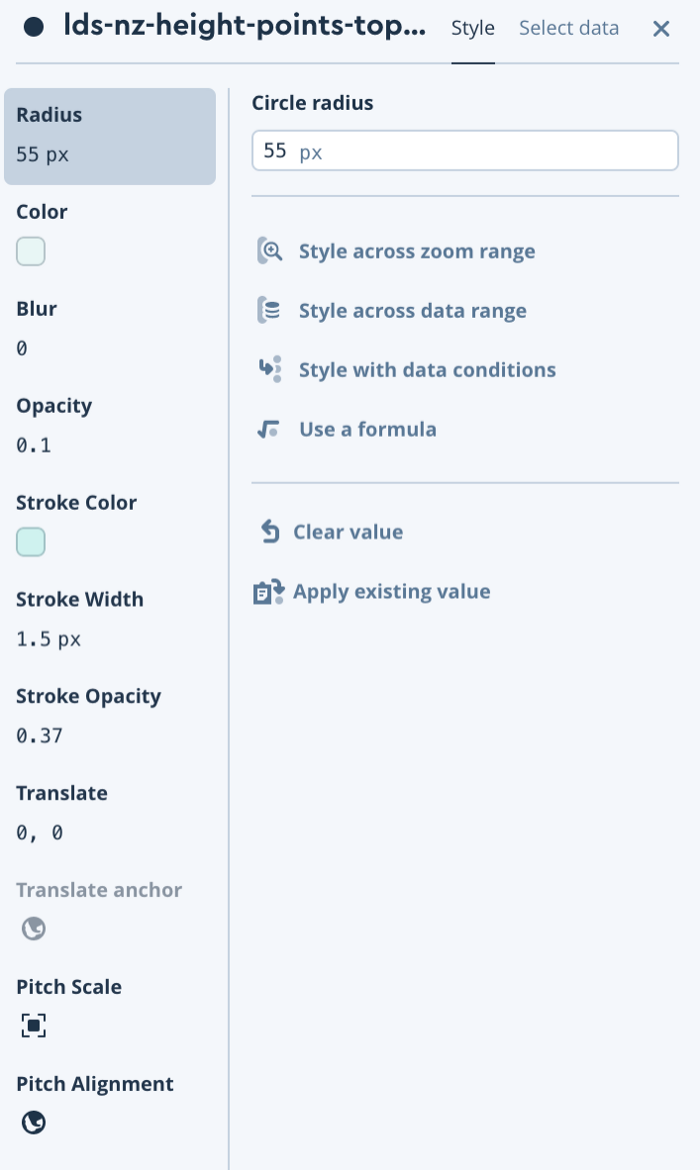
I am now going to style the circles as seen in the screenshot below. I have given them a radius of 55 pixels, a light blue colour with an opacity level of 0.1. To create a “glass disc” effect I am also going to give the circle a stroke colour of a slightly darker blue, a stroke width of 1.5 pixels and a stroke opacity of 0.37.
Voila!

The next tip is to align the those circles with the plane of the map. This a button click away!
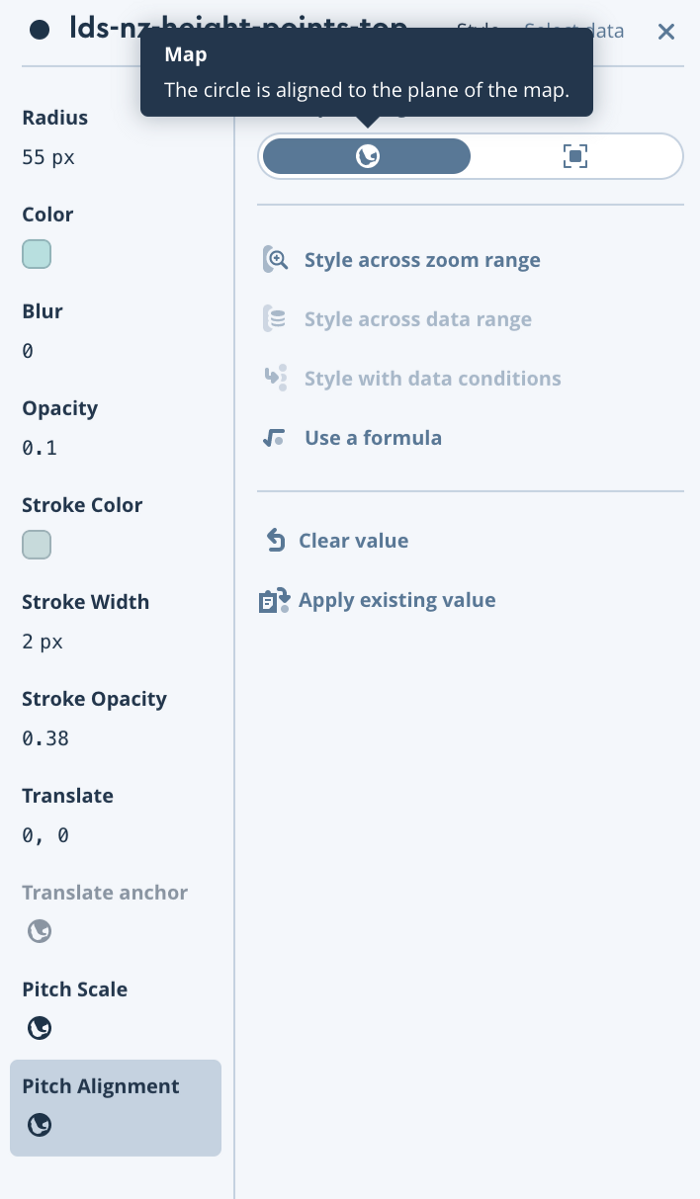
This gives the “glass discs’ a flatter appearance and aligned to the map pitch, an illusion of them sitting above the map. As the map pitch is changed the effect is amplified.
Now to add some glow!
I am now going to duplicate the layer we have used above and position it under the original in the layer hierarchy. This is an important part as we want the glow to be underneath the “glass disc”. You do this by simply dragging it below the original layer in the layer panel.
The glowing effect is achieved by styling as follows: make the radius of the circle 100 pixels, give it a very bright, almost, neon color (I have used a bright green in this circumstance), a blur of 1 and an opacity of 0.5.

And now they glow!
.png)
Adding an icon
As mentioned above, using built-in icons or loading your own custom icons is simple in Mapbox Studio, please follow Part 1 and Part 2 of this tutorial to see how.
Here we will duplicate the layer we have used above, again, and position it on top of the other two layers in the layer hierarchy. This time we want the icon to be on top of the “glass disc”. You do this by simply dragging it above the original layers in the layer panel.
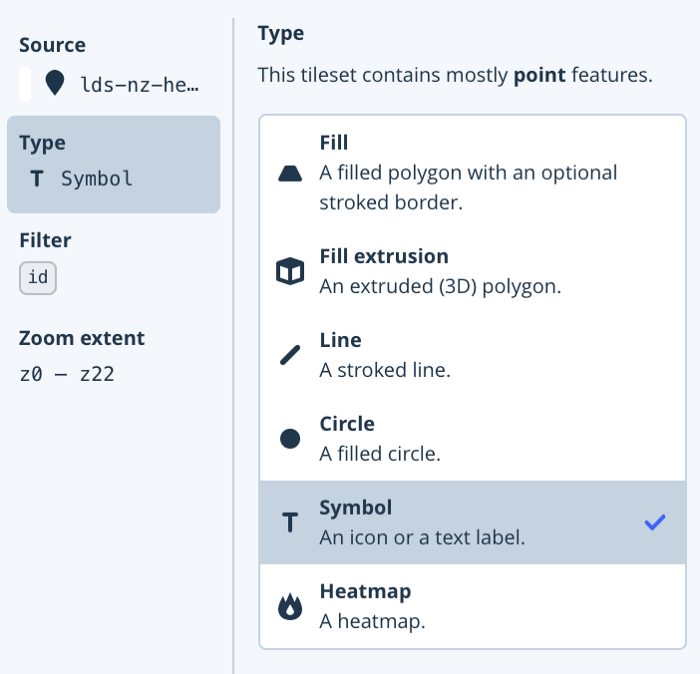
This time we will style the data point as a Symbol type as below:
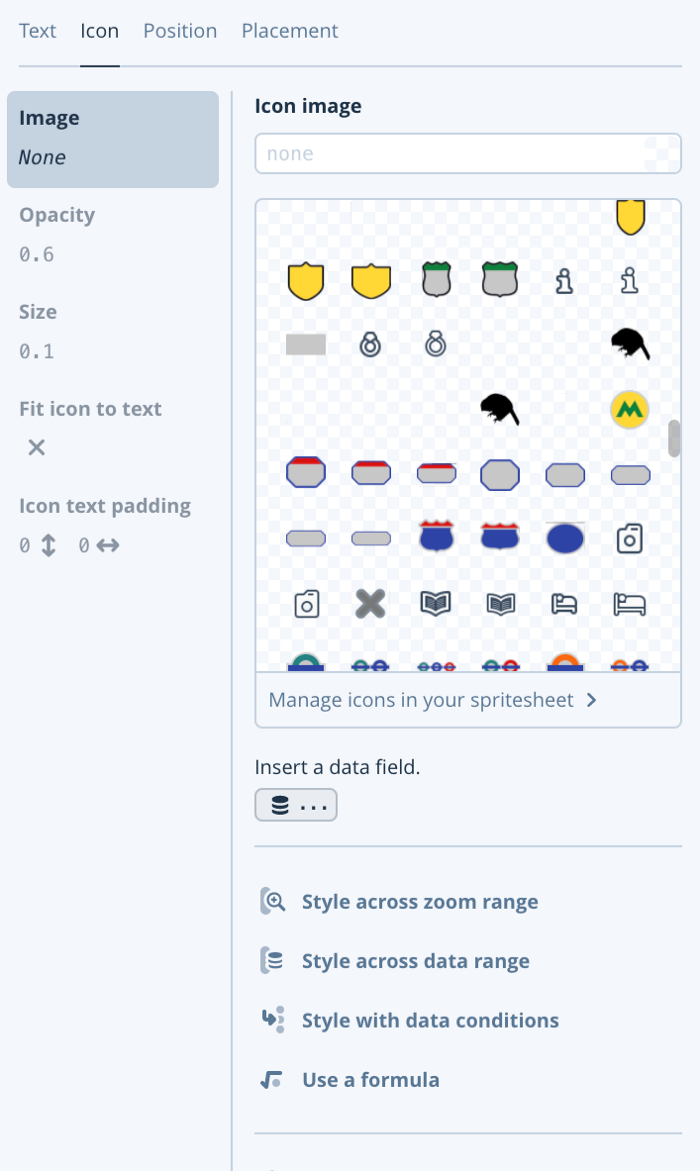
Here you can select your icon of choice, I am going to use a bird symbol for this example. Please note these can be styled across a zoom range, styled with data conditions or styled across a data range. Styling with a data condition, in this case, will give you the option to use different symbols for different kinds of points of interest.
You can also size the icon and give it is some opacity if needed in this panel.
And there you go!
.png)
The example at the beginning of the blog also uses some curved text SVG’s. These can be created, uploaded and applied in exactly the same way as the icon has been above, or using text labels in the traditional way in Mapbox Studio.
Please go and have fun experimenting with place of interest symbols and let me know what you create and how you apply them to your use case.
.png)